Mastering The Art Of The Reverse French Plait: A Step-by-Step Guide
Are you looking to elevate your hairstyling skills and impress your friends with a chic, unique look? The reverse French plait, also known as an inverted French braid, is a stunning hairstyle that adds texture and depth to your hair while being surprisingly easy to master. This style is not just for special occasions; it can be worn casually or dressed up, making it a versatile addition to your hairstyling repertoire. In this guide, we will walk you through the steps to create a reverse French plait, along with tips and tricks to perfect your technique.
Understanding how to do a reverse French plait can transform your everyday look into something extraordinary. Whether you have long, medium, or even shorter hair, this braid can be adapted to suit your length and style. With just a little practice, you can achieve that effortlessly elegant vibe that comes with a beautifully crafted braid. Get ready to turn heads and make a statement with your new favorite hairstyle!
Before diving into the step-by-step instructions, let's explore some essential tools and preparations you'll need to successfully create a reverse French plait. With the right techniques and a bit of patience, you'll soon be on your way to mastering this stylish braid. So grab your brush, some hair ties, and let's get started!
What Is a Reverse French Plait?
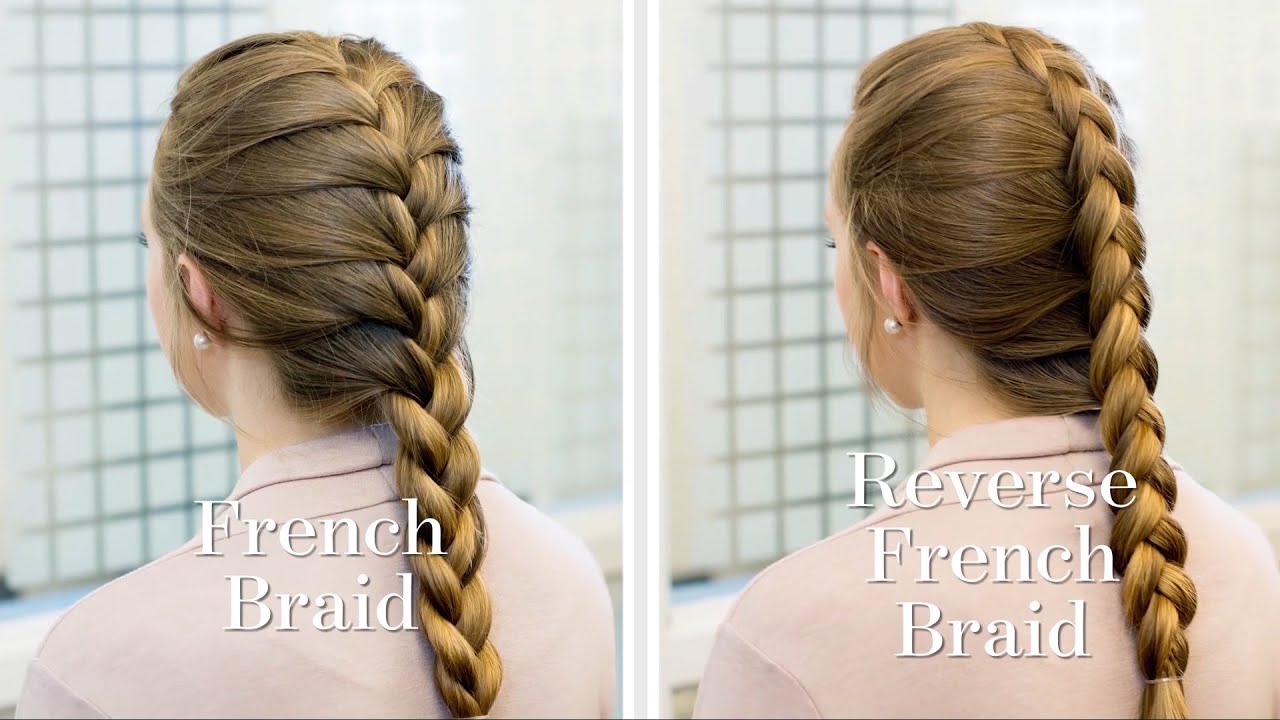
The reverse French plait is a unique twist on the classic French braid. While a traditional French braid involves weaving sections of hair over each other, the reverse version requires you to weave the strands underneath. This technique results in a braid that appears to sit on top of the hair, giving it a more pronounced and raised look. This style not only adds volume but also creates a beautiful, intricate pattern that is sure to catch the eye.
What Tools Do You Need to Do a Reverse French Plait?
Before you begin, gather the following tools to make the process easier:
- A brush or comb for detangling
- Hair ties to secure the braid
- Hair clips to keep sections out of the way
- Hair spray or styling gel for hold (optional)
How to Prepare Your Hair for a Reverse French Plait?
Preparation is key to achieving a flawless reverse French plait. Start with clean, dry hair. If your hair tends to be slippery or fine, consider using a texturizing spray or mousse to add grip. Here’s how to prepare:
- Brush your hair thoroughly to remove any knots.
- If you have bangs or shorter layers, clip them back to keep them out of the way.
- Decide on the parting: a middle part gives a symmetrical look, while a side part can add an asymmetrical flair.
How to Do a Reverse French Plait: Step-by-Step Guide
Step 1: Start with a Base Section
Begin by taking a section of hair from the top of your head, approximately the width of your forehead. This is the base of your braid. Divide this section into three equal parts, holding one in each hand while placing the third section in the center.
Step 2: Begin the Braid
To start the braid, take the right section and bring it under the center section. Then, take the left section and bring it under the new center section. Repeat this process, always bringing the outer sections under the center.
Step 3: Incorporate More Hair
As you continue braiding, begin to incorporate additional hair. Each time you bring a section under the center, add a small amount of hair from the side nearest to that section. This is what differentiates a plait from a braid.
Step 4: Continue Braiding
Keep braiding in this manner, adding hair from the sides until you reach the nape of your neck. Make sure to keep the tension even for a uniform look.
Step 5: Secure the Braid
Once you’ve added all the hair and reached where you want the braid to end, secure the braid with a hair tie. You can leave it as is for a tight look or gently tug at the edges to loosen it for a more relaxed style.
What Are Some Tips for Perfecting Your Reverse French Plait?
Here are some helpful tips to enhance your reverse French plait:
- Practice regularly to improve your technique and speed.
- Use a mirror in front and behind to see your progress.
- Experiment with different hair textures for a unique look.
- For a more bohemian vibe, pull out a few strands to frame your face.
When Can You Wear a Reverse French Plait?
The beauty of the reverse French plait is its versatility. You can wear it to:
- Casual outings with friends
- Formal events and parties
- Work or school for a polished look
- Sports and outdoor activities for practicality
Conclusion: How to Do a Reverse French Plait
Now that you know how to do a reverse French plait, it's time to put your skills to the test! With practice, you'll be able to create this stunning braid effortlessly. Whether you adorn it with accessories or keep it simple, the reverse French plait is sure to become a go-to hairstyle in your collection.
Embrace the art of braiding and enjoy the compliments that come your way! Happy styling!
Understanding Size 2C: A Guide To Children's Shoe Sizes
Unveiling The Weight Of Anna Faris: How Much Does She Weigh?
Exploring The Enchanting World Of Disney Cartoon Characters


